Thursday 30 June 2011

Week 5

This week we had finalised our final design of our Automated Manufacturing System. All we had to do was complete and perfect the programming to make our sorting system the fastest we could. Below is a photo of our final AMS design fully constructed.


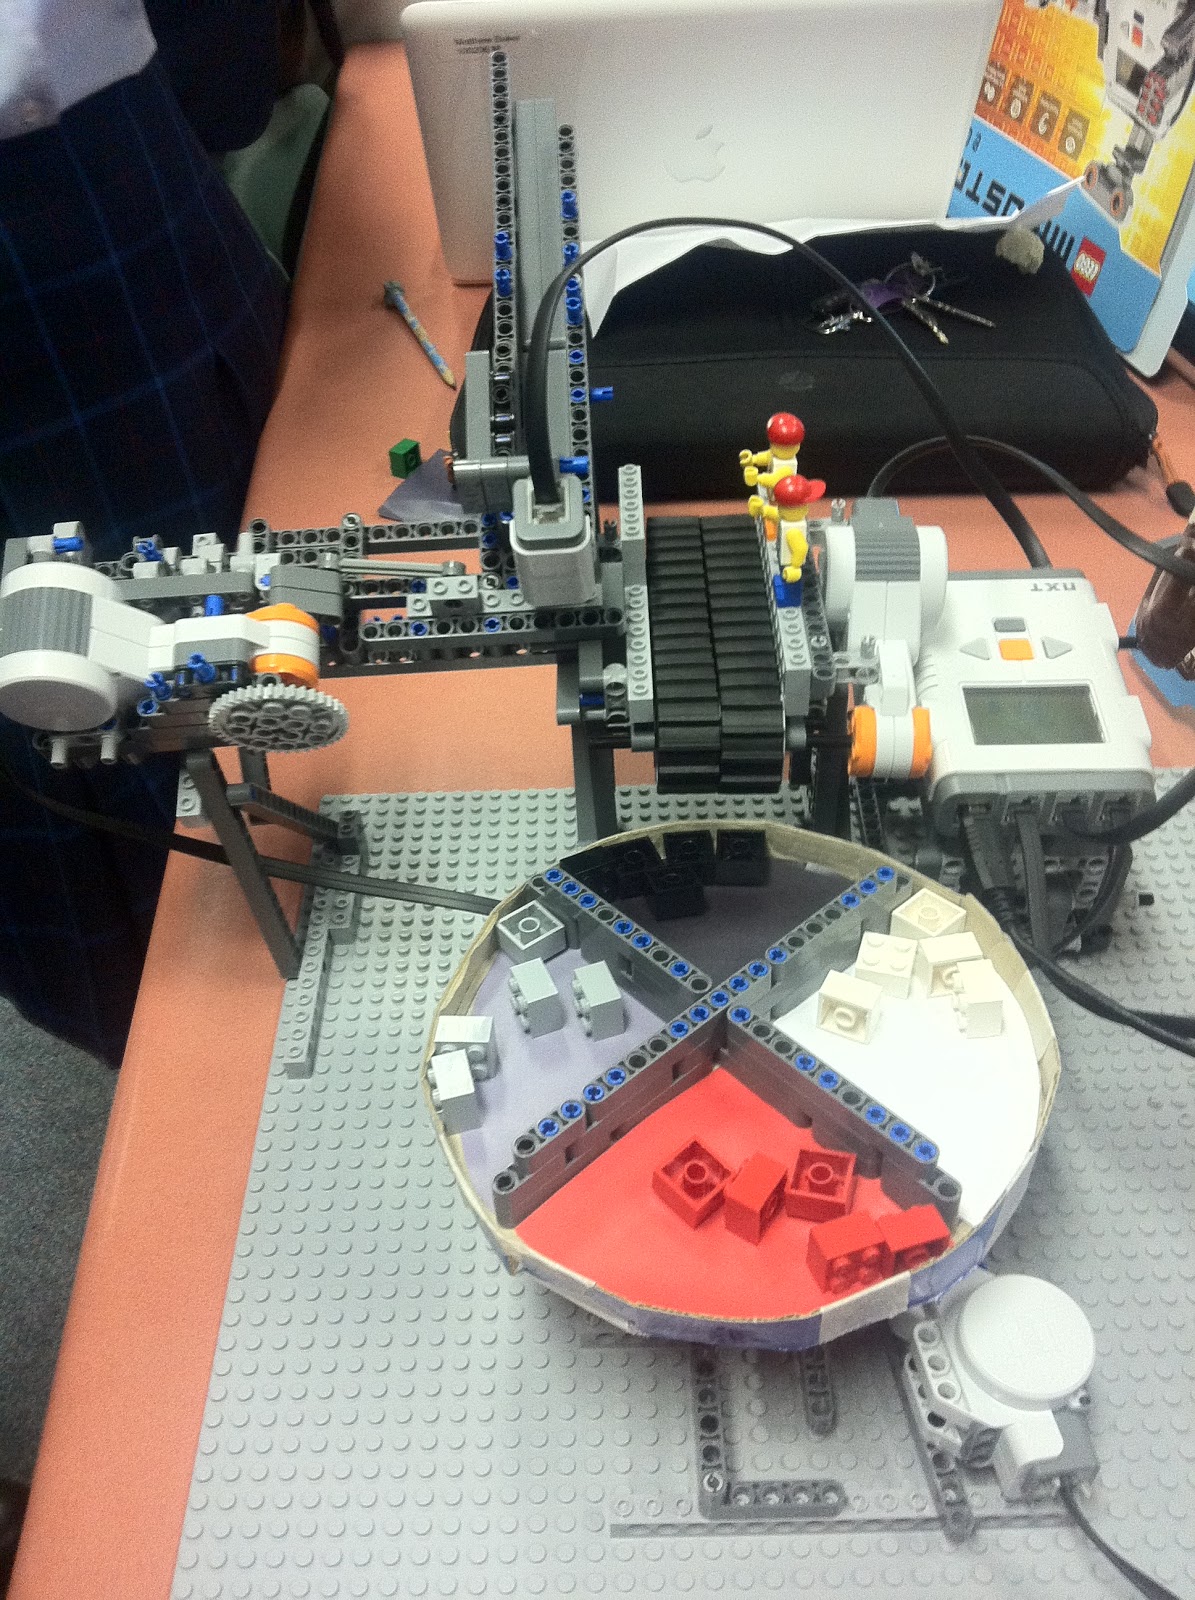
As all of the final construction was done what I did this week was assist Daniel with ideas with the programming to get the best potential from the sorting system to make it go the fastest it can. When we put the AMS into storage after monday's lesson the light sensor had moved a little. The light sensors position is crucial because the slightest movement can change the light reading to determine what colour the blocks are. During Tuesday's lesson I had to spend a decent amount of time during the lesson and throughout lunch with Daniel to reposition the light sensor so the readings were correct again and the blocks were sorting correctly into the right sections. Also if any other member needed a hand with anything I was there to help them out to the best of my ability.

Over the 5 weeks of our assignment I have enjoyed my time working with our team and and very happy with our final product and how it all turned out.

Tuesday 28 June 2011

Week 4

Throughout week four I was concentrating on getting the platform made for the blocks to fall into during the sorting of our AMS. This took a lot of time and patience to complete as little things kept on standing in the way of finishing the construction of this section.
So what i had done is continuing on from last week, I have made a triangular platform with three buckets connected on top of it the hold the blocks. The first problem that came along during the process of making this, was the fact that the heavier the platform got, the more lop-sided on side was as it was running on two gears and this meant that the gears were no longer touching. To overcome this problem I needed to again find a way to strengthen the base and design to make it strong enough to hold the gears in place. After a while of fiddling around and trying different methods, I found a way to do so.
Another problem that we had with the triangular platform was that it was hard to determine the correct amount of degrees the motor needed to turn for the blocks to fall into the right buckets after they had travelled along the conveyor belt. Daniel had played around with the different ways to do this, but it seemed to hard to get perfect as they didn't always end up in the correct position. We overcame this hurdle by scrapping the idea of the triangular platform and turning it into a circular platform divided into different sections for the different coloured blocks. After doing this we found it easier to determine how many degrees the platform was to turn in order for the correct block to go in the correct section.

Before (with Triangular Platform)

After (with Circular Platform)


Week 3

Through the duration of this week I designed and created the base and gears for the turntable platform that the pieces of lego will be falling onto once they have been detected by the light sensor and rolled along the conveyor belt.


I had a few troubles whilst creating this section of the Automated Manufacturing System (AMS). My first problem was actually figure out how i will support the gears that are going to turn the platform and what pieces of lego i will need to use to do so. Then once I had done that and gone ahead a created this section it was obvious that the way I had set it up wasn't strong enough to support the gears. After seeing this I re-assembled parts and added elements that then strongly supported the structure and enabled the gears to run smoothly.
Along with doing these things I also assisted the other members in our team if they needed help with any of the construction of other parts of the AMS, which shows how well we work as a team because we are there for one another if they are stuck with certain things.

Thursday 9 June 2011

Week 2

What I did this week was following on from last week with getting an understanding of all the equipment that we are to use to create our automated manufacturing system.
I began to create a conveyor belt, using one of the three motors we have in our kit, gears and the other pieces of lego for design and support. This conveyor belt was originally a rough practise run, but then we decided to use it and incorporate it into the teams actual project.


Other than these things, I believe the group has made good progress with the assignment and I am looking forward to oncoming weeks.

Week 1

Throughout this week I played around with all the different parts of our equipment that we are using to create our project. I was doing this to increase my understanding of how the equipment will work when we are creating the actual project design. I think that now because I have the understanding of the equipment that when we create our automated manufacturing system we will have better time efficiency knowing what to do with all the parts and how they will work, instead of not having any idea what does what and what goes where.
I also designed and created our team's logo as you can see in the post below the information about how I created it and pictures of the final product.

Tuesday 31 May 2011

Logo Design

On the 31st May 2011 I designed the official ManBed™logo to put into the header of our team's blog page. I designed the logo in Adobe Photoshop CS3. Colour adjustments were made on the 1st June 2011, so that the logo matched the same colour as the text.

Before Colour Adjustment

After Colour Adjustment